I am not a huge fan of classic quilts. Oh, I love to see modern takes on the classic techniques and I love to look at old quilts, but I don’t really want to spend my time sewing log cabins or flying geese or stars to create a quilt. I much prefer modern quilts, panel quilts, and picture or realistic quilts (although, to be honest, I am very far from being able to make those last).
That doesn’t mean I am not averse to using a classic quilt technique, especially in something small. Take Terri Wilhelm’s Dresden Color Wheel mug rug. The Dresden Plate quilt block is a flower made up of long “petals” that can have either a pointy or a rounded end with a small circle sewn on top in the middle and then the whole flower is appliqued to the background of the block.
Terri’s mug rug is a variation on that idea, with small petals and a large circle, since the middle of the flower will be used to set down your cup.
I fell in love with her mug rug, so much so that I went and bought a special Dresden template kit for cutting petals. Mine unfortunately didn’t have the lines to cut smaller petals so I drew some on the back.
The nice thing about this kind of project is that you can just use fabric remnants to create the petals since you’re only cutting pieces that are 1 and a half or 2 inches in length.
While I was meditating on the colours I wanted to use, I decided that I would try to make a sunflower: brown middle and yellow petals. I have enough yellow and beige fabric to make the petals but I was worried about having enough brown to cut two 4 inch wide circles, so I bought a fat quarter at Walmart. It’s the closest store where I can buy fat quarters and while the choice is not huge, they do tend to have nice patterns for the cotton fabric.
So here is my material. I pulled out and cut the fabric for the petals before I took this picture. The black fabric is felt for the backing.

Figure 1. Leftover fabric for petals, brown fabric for middle circle, part of the Dresden kit for making petals, and black felt.
To create the spiky petals, you have to sew the larger piece of each individual petal together, front facing. I chain sewed the petals to make it go quicker. Just a heads-up when chain sewing: I didn’t leave a lot of space between each petal and that resulted in some of the ends starting to undo themselves since the thread was too close to the edge.

Figure 2. Of course, right after I took this picture, the sewing went all crooked and I had to undo the yellow trapezoid there.
And here’s a little tip I picked up when I took my first quilting class: use a piece of fabric to start the chain sewing. I also use it when I sew my quilt blocks and I don’t need to lock the fabric at the beginning.
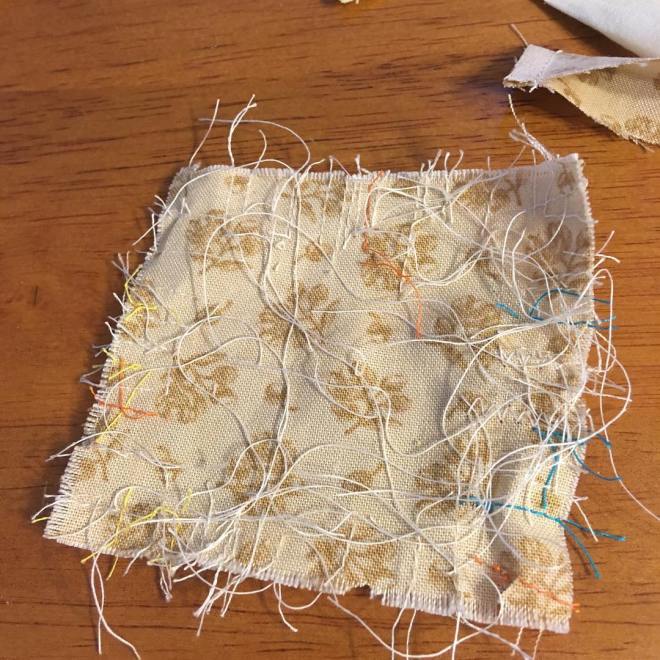
Figure 3. Yeah, I use it a lot.
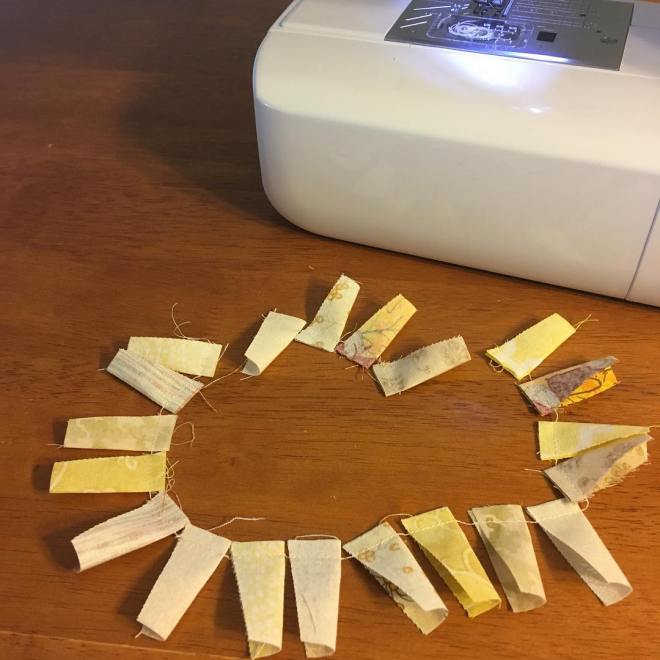
Figure 4. Chain sewn petals.
Now comes the fun part where you create the spiky tip for the petal. First, I cut a bit of material to help make the tip less bulky. This is not a step mentioned in Terri’s tutorial. By the way, don’t do like me and cut on the wrong side: you want to cut on the side where the fabric is folded, not where it is open.

Figure 5. Before and after unfolding the fabric.

Figure 6. Cut the fabric; careful not to cut through the sewn section.
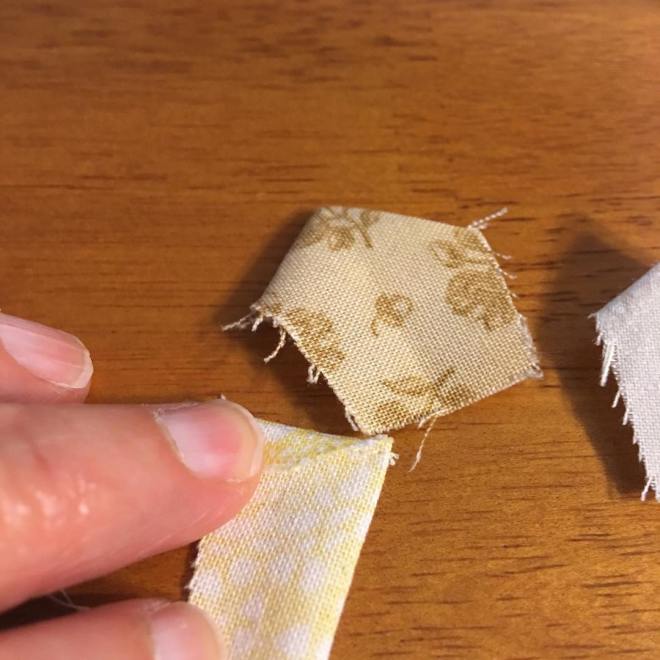
Figure 7. I finger pressed the seams at this point; you may or not want to do that, I found it made the process a bit smoother.
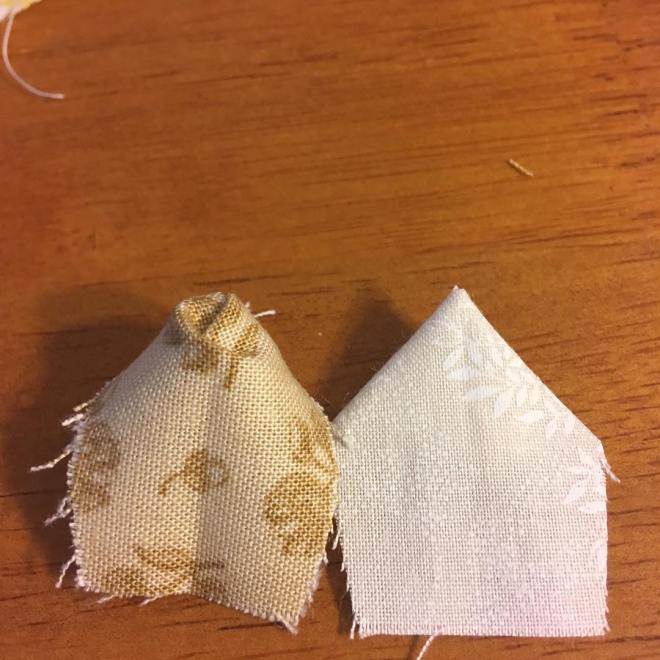
Figure 8. Inverted fabric, before and after poking out the tip; careful here, I had a few incidents where I started unraveling the sewing accidentally.

Figure 9. At this point, you have a 3-d petal. Hand press everything down to obtain a neat point.
At this point, I had 20 individual pointy petals. I decided to chain sew two petals face-to-face together. It’s faster than doing it individually. Also, I didn’t really care about the order of my petals, except to make sure I didn’t sew two of the same fabric next to each other. Then I ironed the seams open on each dual petal.

Figure 10. Ten double petals
Sometimes, when you’re thinking about what you’re going to write in your blog, you don’t pay attention as to whether the petals are face-to-face or face-to-back.

Figure 11. Oops! Here you can also see how the sewing for the tip is coming undone. It doesn’t matter since it will all be sewn down.
When I finished sewing all the petals together, I pressed the seams open on the backside.

Figure 12. Finished petals ring, backside.

Figure 13. Finished petals circle, front.
Now I’m ready to cut the fabric for the central hole. Except, wait a minute!

Figure 14. Width of the central circle.
That central circle is supposed to be 4 inches wide, at least that’s what Terri measured for her original project. I’m not sure what has happened here. Maybe it’s because I didn’t use the same template as her to cut the petals; perhaps her template creates wider petals, resulting in a larger circle. I also just realized that I cute 20 petals but that hers has 21 petals. That too would create a larger circle, though not 4 inches.
I tried cutting a template from some cardboard, but my first attempt was too small. I found a wine glass that seemed to be a good size and made a second template from that.

I cut two pieces of the brown fabric, sewed them together face-to-face, cut a hole on one side and inverted the circle so that the face fabric was on top. Alas! My template was too small! I am going to have to make an even bigger one. So frustrating!
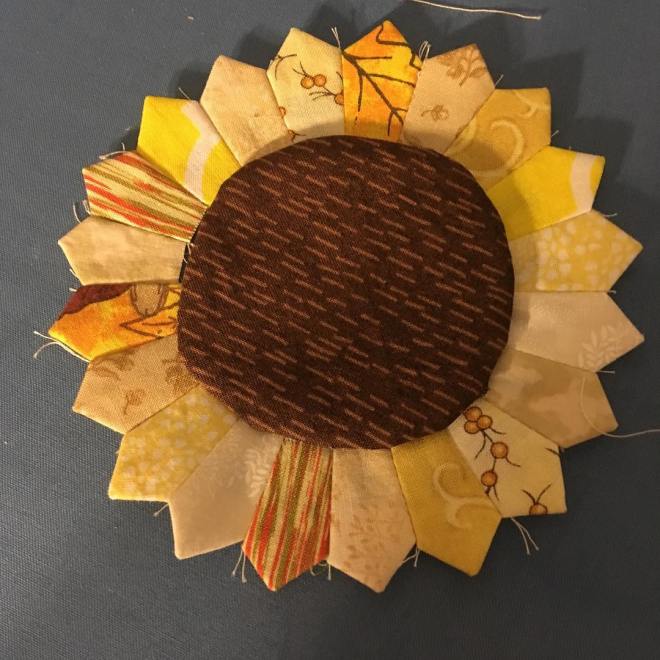
Figure 15. Too small center
ONE WEEK LATER
I set aside this project for a bit: I started a new job and was spending my time in training and not in the mood for sewing in the evening. Plus, I had to find something new to draw the circle with.
During that time, I realized why my circle was too small: the 1/4 inch seam means that you’re losing a half inch width in total when you’re doing a circle. Doh! No wonder the original pattern asked for a 4 inch circle!
After some search, I found an object with an approximate 4 inch width.

Figure 16. New template, new central fabric circles
This time, it worked! I was able to sew the brown fabric to the petals, sewing around the circle twice. Then I placed the whole project on a piece of black felt and sewed first the petals to the felt and then around the ditch of the center piece.
The finished back looks like a black sun.
 Figure 17. Backside of the finished mug rug
The front, however, does look like a sunflower, so I am quite happy with it.

Figure 18. It’s really more of a coaster than a mug rug, to be honest

Figure 19. Action shot!
