I consider myself an advanced beginner. I know the basics of using my sewing machine, I’ve learned a few tips and tricks that I sometimes remember to put into practice and sometimes forget, I’ve made a few simple projects. They’re not perfect, but I like them.
I know my limits, though. I am not ready to tackle complicated sewing projects and I still require step-by-step instructions in how to do a project. Sometimes, I come across projects that have the bare minimum of explanations on how to get it done (no information on what size to cut the material, few images demonstrating what to do); I barely understand what is required of me, so I put those aside.
When I first saw SewMamaSew’s owl tote, though, I knew I had to make it. It didn’t hurt that it was a free project.

Figure 1. From SewMamaSew – is this not the cutest bag ever? How could a birdwatcher resist?
I reviewed the instructions to make sure I understood them enough to actually make the bag, poked around my stash to find fabric, and, satisfied that I had everything I needed, set about making the bag.
Although the project suggests using batting, I replaced it with fusible interfacing – mostly because I didn’t have enough batting and I didn’t want to go out just for that.

Figure 2. Some rests from other projects and some fat quarters. The pale yellow will serve for the exterior of the bag, the leaf fabric for the interior, and the branches and two browns will be used for the flap and the pockets

Figure 3. Fabric cut; I chose the moose ribbon for the strap rather than use fabric

Figure 4. While I was prepping the yellow fabric, I pricked my finger and got blood all over the paper; by a minor miracle, none got on the fabric itself.
I cut two pieces of the moose ribbon, sewed them together and put the strap aside for the moment.
Right off the bat, I encountered a problem understanding the instructions, because the first thing you’re supposed to do is sew the flap to the top of the bag interior. But it didn’t say if you were supposed to sew the two parts of the flap together. I puzzled over the picture, read through the instructions, and still couldn’t figure it. After some head scratching, I decided that I could definitely see sewing on the sides of the flap, so that must mean I was supposed to sew the two parts together. So that’s what I did, and oh, I did such a good job! I remembered to snip the parts where the sewing creates squares so that I could have a nice point once I inverted everything back right side out.

Figure 5. Look at the tip, how nice and pointed it was. Sigh.
I also sewed up the side and front pockets and the so-called ears while I was at it. In actual fact, I sewed the pockets first (well, right after the strap) and forgot to snip at the corners, so my corners are not as nice as they could be; but I did remember to snip whenever there was a curve, which gave me a semi-nice curve as you can see at the bottom of the side pocket below.

Figure 6. Ears, front pocket, and the two side pockets. The dark brown is the exterior, the branches fabric is the interior of the pocket.
That was my first day.
That night, I woke up and realized I had made an error. I should not have sewed the two parts of the flap together. In actual fact, the internal part of the flap is sewn to the interior of the bag, and the external part of the flap is sewn to the exterior of the bag. I had to unsew the flap, and oh, how sad that made me, you have no idea.

Figure 7. Sorry about the out-of-focus picture there. These sections had originally been squares, now I had to cut the fabric to make the sides cleaner
Now I could sew the internal bag correctly. I was happy I had decided on a whim to buy clips I found at Walmart; they made the process a lot easier than using pins.

Figure 8. Sewing the sides to one of the interior panels; as you can see, the clips were most useful where the fabric made a curve at the bottom

Figure 9. Parts of the interior bag

Figure 10. Inner bag finished.
Now I could start on the outer bag, and here I encountered more problems. First I sewed the front pocket to the front of the bag, and that went well.
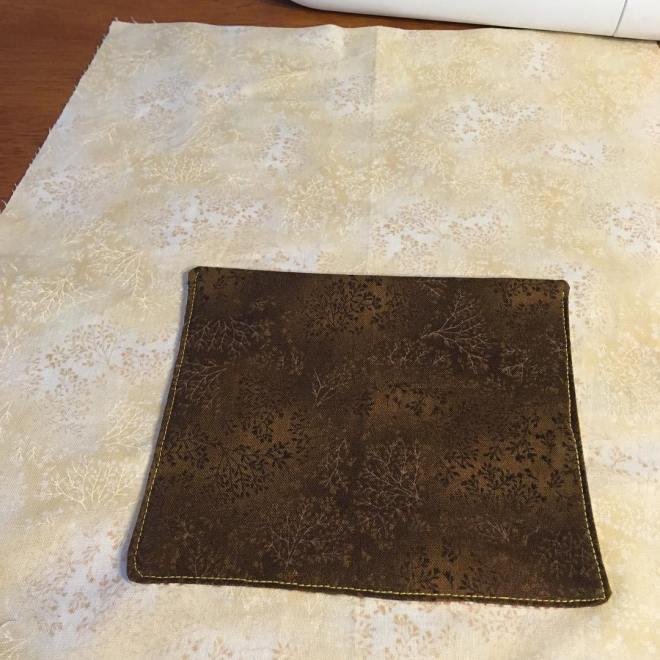
Figure 11. Sewing the front pocket to the front panel wasn’t an issue, but getting rid of the creases proved well nigh impossible
Then I had to sew the back pocket to the zipper to the back panel and the top contrasting panel, and that proved problematic. I had never added a zipper in the middle of a panel before and I didn’t know what I was doing. Luckily for me, a friend had previously pointed me to ikatbag.com as a source of bag making information and she has a whole series on how to integrate zippers into your bags. In particular, I studied this explanation for a flat pouch, but I have to admit I didn’t completely understand the instructions and I didn’t apply her explanations correctly.
If you look at her explanations, she shows clearly how you add fabric to the sides of the zipper that go all the way to the end of the bag. I did not do this. I should have done this. Instead, I put a fabric stop at one end and none at the other end. This made it really hard to sew the zipper to the fabric around it. Next time, I will follow ikatbag’s suggestions completely. You can see below how I had to sew crooked around the ends of the zipper in order to make sure that it was sewn to the two fabrics above and below it.
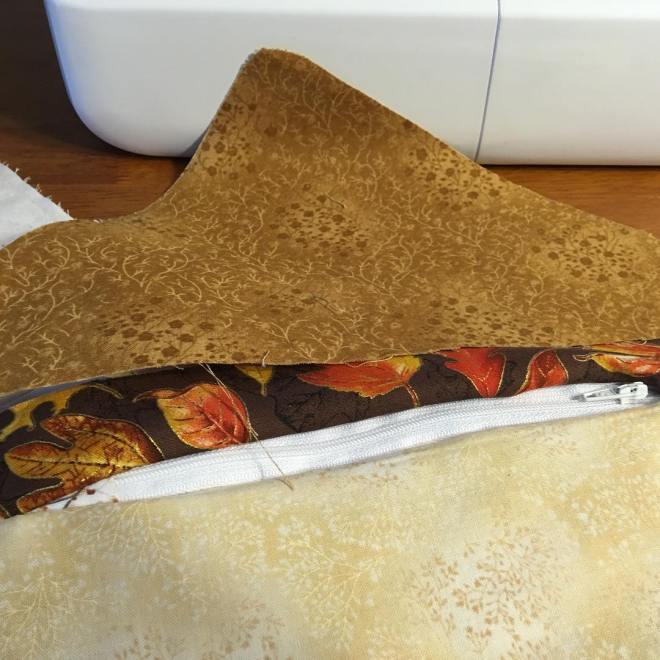
Figure 12. I also noticed at this point that the rectangle of fabric that goes at the top of the back panel was supposed to be the same as the top of the flap. Since I had already sewn the zipper and there was no way I was undoing it, I decided that this was going to be a feature, and totally not a bug.
At this point, I sewed the sides and bottom to the front panel, and the back panel to the sides and bottom, giving me a completed external bag.
If I had read carefully, though, I would have realized that I was not supposed to do that.
I realized that something was wrong when I went to the next step: sewing the side pockets to the side and front of the bag.
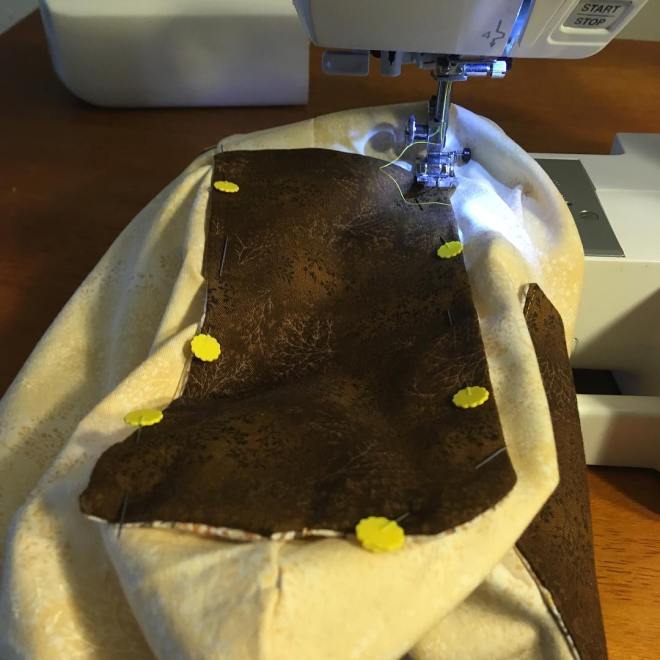
Figure 13. Side pocket pinned to side and front of bag.
I couldn’t sew the pocket! Well, I could, but only with great difficulty and also sewing the front and back panels together, which obviously was not supposed to happen.
If I had read correctly, I would have seen that I wasn’t supposed to sew the bottom of the bag so soon. So I undid part of the bottom and that solved the issue.

Figure 14. Have I ever told you how much I hate unpicking thread? Ugh. So painful!
Once I had realized my error, I was able to sew the side pockets without an issue. Then I resewed the bottom. At this point, I had my inside and outside bags.

Figure 15. The internal and external bags are almost ready. I just needed to add the eye buttons and the snap to the external bag.
Once the buttons were hand sewn to the external bag, I hand basted the strap and ears to each side of the external bag, then slipped that bag inside the internal bag, and then I put the project on hold for a while.
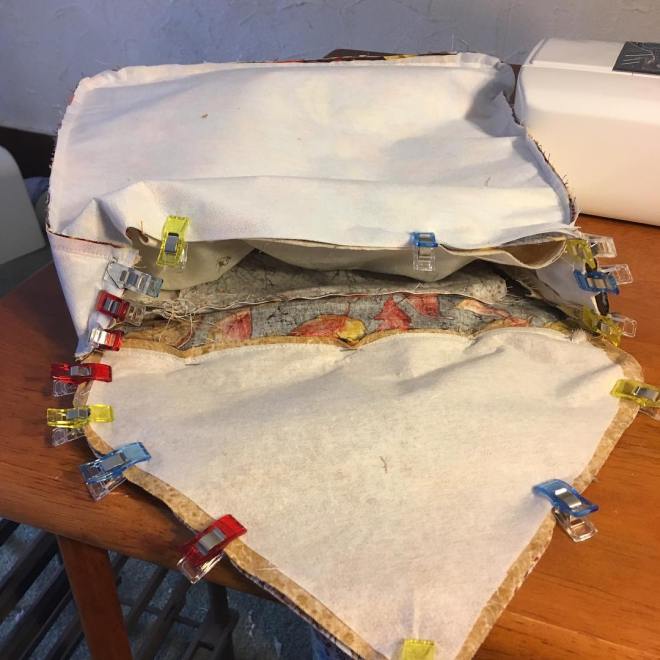
Figure 16. Inner and outer bags clipped together, waiting for me to gather my courage for the last push.
I have to admit, I wasn’t too happy about having to sew the inner and outer bags inside-out and then having to pull them through a small hole. The inner bag was quite stiff because of the interfacing and anyway, this process of sewing something right sides facing and then pulling them through a tiny hole is such a painful one. We hates it, my precioussss! And I didn’t want to make an error while sewing the two parts together, so I went looking through the web and found a video where, instead of doing this, the person simply put the inner bag into the outer bag, put the flap between the two, and sewed the tops together (making sure to flip down the topmost part so the raw edges wouldn’t be exposed.
I am pretty sure I could do that with this bag. But, since I had been following the instructions, I was too far along to do that.
Today, I finally had time to finish the bag. But wait! Did I have time to make one last error? Of course I did!
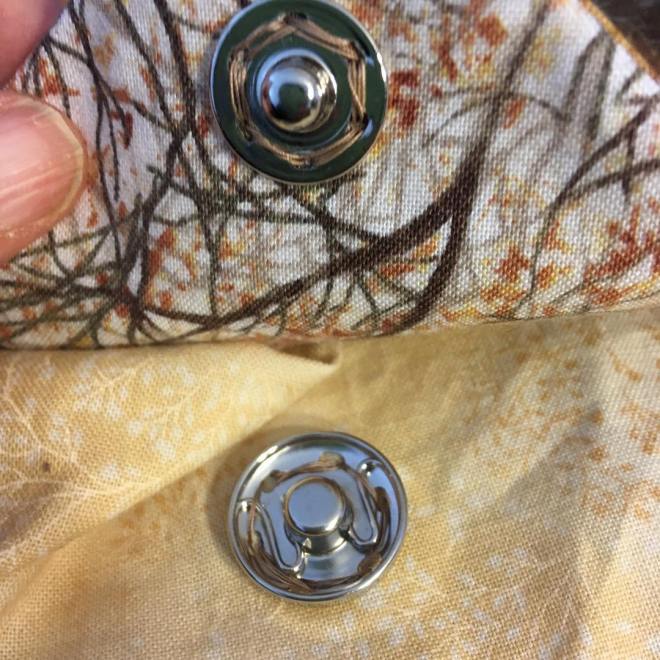
Figure 17. Oops! I sewed the bottom part of the snap button upside down. Sigh.
After correcting the button and topstitching around the top of the bag, I was finally finished. And here is my version.

Figure 18. Finished, finally.

Figure 19. Bonus picture. Back pocket looking like a monster about to eat us!
So what have I learned from this project? First: be more careful when I read the instructions. I could have saved myself a lot of time and annoyance if I had done a full and careful read-through from start to finish. Also, if I had taken the time to put the various pieces together before sewing them, I would have noticed that the back rectangle was cut from the wrong fabric for my bag (if I had used the same contrasting fabric everywhere, as the original purse did, it would not have been an issue).
Second: I need more practice with sewing zippers to bags, especially zippers in the middle of the bag. I will make an effort to find projects like this in the near future.
Third: The length of the strap is too short for the size of the bag. If I remake this bag, I’ll use a longer strap. I’m not sure if this is an error on my part or what – in the original picture, the strap looks plenty long. Maybe it’s just that I like long straps.
Fourth: I need to buy starch and see if that helps get rid of the wrinkles. I hate wrinkly bags
Fifth: If I do redo this bag – and I may, I do love me some owls – instead of following the instructions as is, I will use the “no having to turn the bag inside out” approach.
