Why I’m not ready for quilt shows

The peacock hanging quilt is progressing. In fact, I have the top finished. However, I need to go out and buy some fabric for the backing and some batting to go in between.

Quilt top finishedFigure 1. Finished top

This project is super easy compared to some of the other hanging quilts I’ve done, even if it is huge. Mostly it was just cutting fabric with very little sewing required.

I needed to cut the excess fabric on the peacock panel while trying to make it as rectangular as possible. Then I had to cut strips from the lilac coloured fabric and from the flower print fabric and sew them to the quilt.

The panel itself was a bit smaller than the instructions said it would be, so I ended up cutting the lilac fabric wider and then, once I had sewn those strips to the panel, I cut off the excess lilac to get the size suggested by the booklet. I should have cut the top and bottom strips more, but decided in the end that I preferred having the same width on all the lilac strips, possibly because it’s my favourite colour and I can never get enough lilac. That means that my panel will end up a bit longer than what it should have been, but I prefer it like this.

I encountered some issues with sewing the strips of the flower fabric. I had to cut three strips of 3 and a half inch wide fabric, and I just could not manage sewing the first two strips together without making an error. In frustration, I went off to YouTube to see what I was doing wrong. It turned out to be a silly error. I was trying to match the two ends of the fabric together, but in reality, you’re supposed to leave a bit of fabric extra protruding on both sides, which makes it so much easier to figure out whether the two strips are meeting at a right angle and where to sew.

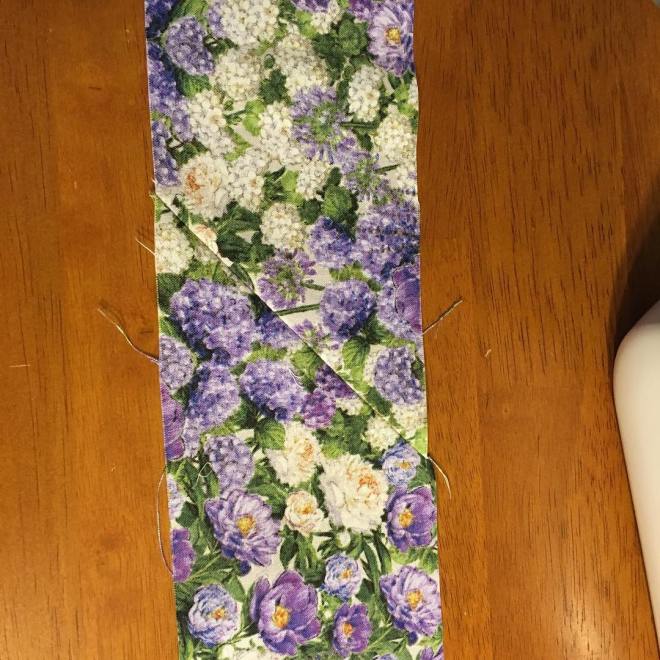
Look at the nice sewing I didFigure 2. Sewing at a 45 degree angle; you can see how the fabric meets here.

Unfortunately, my first attempt, while well done, was, well, not well done.

Joining errorFigure 3. Pretty sure that’s not how that’s supposed to be.

I did eventually get the strips attached together correctly. However, I realized, after I had practically finished sewing the flower strips to the quilt, that I should have paid attention to the pattern’s orientation. It’s a good thing the pattern is busy so it doesn’t show too much that the flowers are pointing in one direction on one side and in the other direction on the other side.

Sewing two strips togetherFigure 4. Success! Oh, wait, maybe not a complete success there.

That was a silly error on my part.

I also didn’t pay attention to the orientation of the flowers when I sewed the strips to the quilt, so sometimes the flowers are pointing towards the panel and sometimes they are pointing away from the panel.

This is why I am not ready for a quilt show: attention to detail.

But the progress from a new quilter (or anything, really) to an expert is strewn with the errors that teach us important lessons which, we hope, we will remember the next time we make a quilt.

Anyway, I’m going to have to put this quilt to the side until I have time to go to a fabric store to get batting and fabric.

I also don’t know what pattern I want to use when I am going to quilt this thing. Or what colour thread I should use. Decisions, decisions!

Jelly Rolls and Quilts

You would think that, with a quilt top that is just waiting to be assembled, another quilt for which I need to cut the fabric, a hanging quilt I have pulled out of its package in order to start it, and a couple of panels that will eventually be turned into small quilts, I would not be thinking about yet another quilt project. Well, you’d be wrong.

I have to admit that jelly rolls have long puzzled me. Why would you want to buy a roll of pre-cut strips of fabric? I mean, sure, it would save you some time, but I just couldn’t see what type of project could profit from these rather expensive fabric strips.

Well, this week, I discovered that you can make a very quick lap quilt just using a single jelly roll. I’ve been considering making myself a lap quilt because I am always cold and knitting or crocheting an afghan takes forever (I already have made myself a crochet afghan, but more afghans are always better). There are some really beautiful rainbow jelly roll quilts out there that I would love to emulate.

So add the jelly roll quilt to Future Projects I Promise I will Get To As Soon As I Finish The Projects I have Already Started.

The Kingston Quilt Show 2018

Sunday, I went to the 2018 Kingston Quilt Show. I was hoping to buy a few quilt kits or, at the very least, pick up some fabric; and of course, admire other people’s quilts.

The Kingston Quilt Show is not as big as some of the other quilt shows I’ve been to in the past; it only took me about 2 hours to go through the whole thing, including stopping to browse at the vendor kiosks. There were a lot of lovely quilts displayed. I won’t put up all of the quilts I took pictures here, but a few of them did strike my fancy.

One of the first quilts that were on display was this beautiful snowy owl quilt. It was a tiny thing and look at the details on that owl! I wanted to take it home with me, or at least learn how to do it myself.

snowy owl quilt

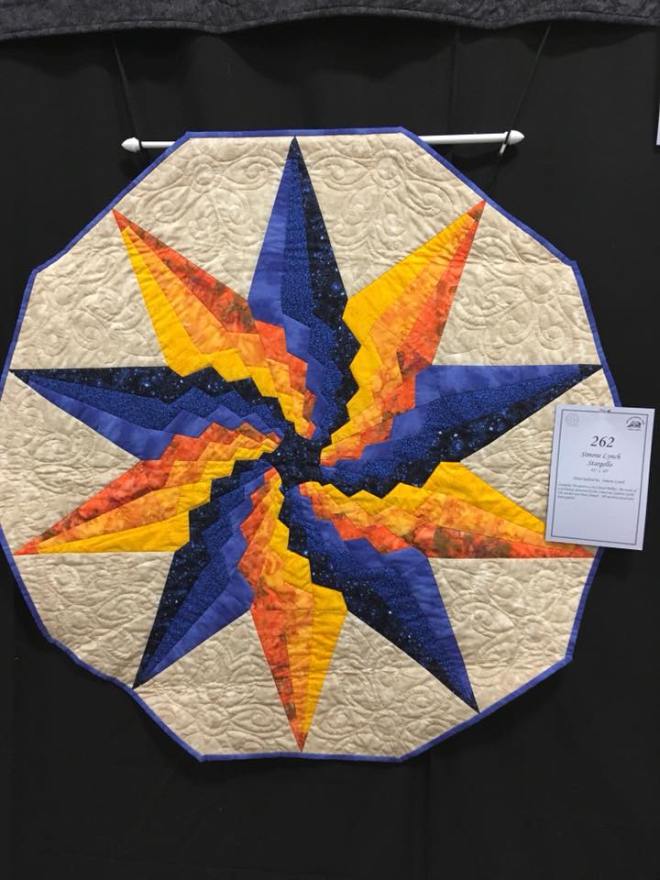
Another small quilt was this blue and yellow sun or star quilt. I just love the colours of it.

BlueYellow Star Quilt

Another quilt, a full size one in this case, that struck me for its colour choices was this brown and blue quilt. The details of the quilt said that it was a kit that the person had bought in the American south-west. It is reminiscent of the earth and turquoise of that region.

BrownBlue quilt

I feel a very great desire to make this sheep quilt. The eyes are buttons or googly eyes. Crib sized quilt.

Sheep Quilt

I was impressed by the technique used to make the details on this full-sized quilt. Special acrylic paint was used on various plants which were then pressed onto the fabric, making for delicate coloured leaves.

Shades of Autumn quilt

There was also a small corner dedicated to modern quilts. I took a picture of a table runner, but they had several lovely quilts on display.

abstract modern quilt in red black and blue

I did end up buying some fabric and a quilt pattern. I was tempted by several Christmas tree kits, but decided that if I was going to do one of those, I would build a tree from pieces of fabric and not use a panel (although the wild animals with gifts and candy canes was so cute!).

First, I was happy to find the birds in a tree panel that I can use to make a window quilt:

birds on a tree panel

I was looking online for that panel but having no luck, so I was super happy to find a vendor who had a whole lot of them – I even almost bought two, but then decided that that would have been silly of me.

There were a few other bird panels that tempted me, but this rather large cardinals in a forest panel came home with me. I am thinking it could make the centerpiece of a lap quilt. It’s quite wide, though, so I’m not sure if a lap quilt would be the best use for it.

cardinals panel

And finally a hanging quilt kit with, surprise!, another bird on it:

quilt kit

I chose this one because of the price, to be honest. Some of the kits I was interested in were close to 100 dollars for a full quilt or 60-70 dollars for a hanging quilt. Since my budget was limited, I needed to choose carefully.

So that was the Kingston Quilt Show of 2018. I came away with some good ideas for quilts, lots of photos, and some fabric for my stash. I count that as a success.


Sunflower coaster

I am not a huge fan of classic quilts. Oh, I love to see modern takes on the classic techniques and I love to look at old quilts, but I don’t really want to spend my time sewing log cabins or flying geese or stars to create a quilt. I much prefer modern quilts, panel quilts, and picture or realistic quilts (although, to be honest, I am very far from being able to make those last).

That doesn’t mean I am not averse to using a classic quilt technique, especially in something small. Take Terri Wilhelm’s Dresden Color Wheel mug rug. The Dresden Plate quilt block is a flower made up of long “petals” that can have either a pointy or a rounded end with a small circle sewn on top in the middle and then the whole flower is appliqued to the background of the block.

Terri’s mug rug is a variation on that idea, with small petals and a large circle, since the middle of the flower will be used to set down your cup.

I fell in love with her mug rug, so much so that I went and bought a special Dresden template kit for cutting petals. Mine unfortunately didn’t have the lines to cut smaller petals so I drew some on the back.

The nice thing about this kind of project is that you can just use fabric remnants to create the petals since you’re only cutting pieces that are 1 and a half or 2 inches in length.

While I was meditating on the colours I wanted to use, I decided that I would try to make a sunflower: brown middle and yellow petals. I have enough yellow and beige fabric to make the petals but I was worried about having enough brown to cut two 4 inch wide circles, so I bought a fat quarter at Walmart. It’s the closest store where I can buy fat quarters and while the choice is not huge, they do tend to have nice patterns for the cotton fabric.

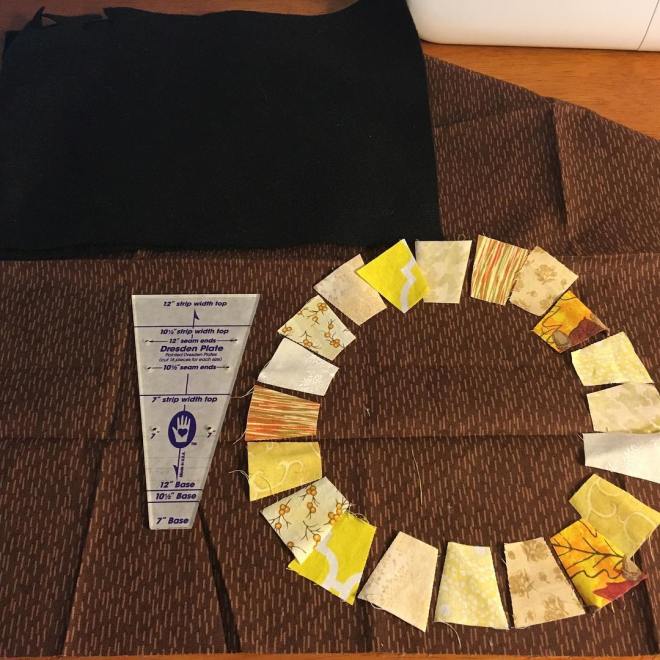
So here is my material. I pulled out and cut the fabric for the petals before I took this picture. The black fabric is felt for the backing.

Materials

Figure 1. Leftover fabric for petals, brown fabric for middle circle, part of the Dresden kit for making petals, and black felt.

To create the spiky petals, you have to sew the larger piece of each individual petal together, front facing. I chain sewed the petals to make it go quicker. Just a heads-up when chain sewing: I didn’t leave a lot of space between each petal and that resulted in some of the ends starting to undo themselves since the thread was too close to the edge.

Chain sewing

Figure 2. Of course, right after I took this picture, the sewing went all crooked and I had to undo the yellow trapezoid there.

And here’s a little tip I picked up when I took my first quilting class: use a piece of fabric to start the chain sewing. I also use it when I sew my quilt blocks and I don’t need to lock the fabric at the beginning.

starter square

Figure 3. Yeah, I use it a lot.

chain sewn petals

Figure 4. Chain sewn petals.

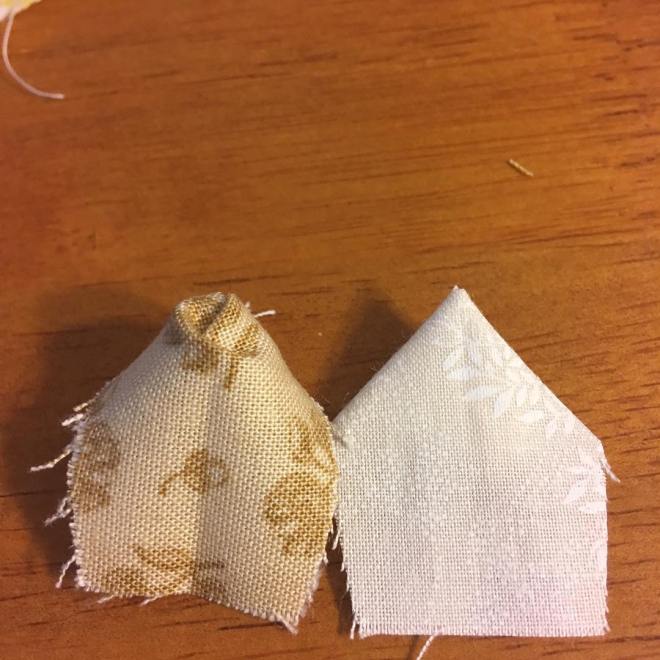
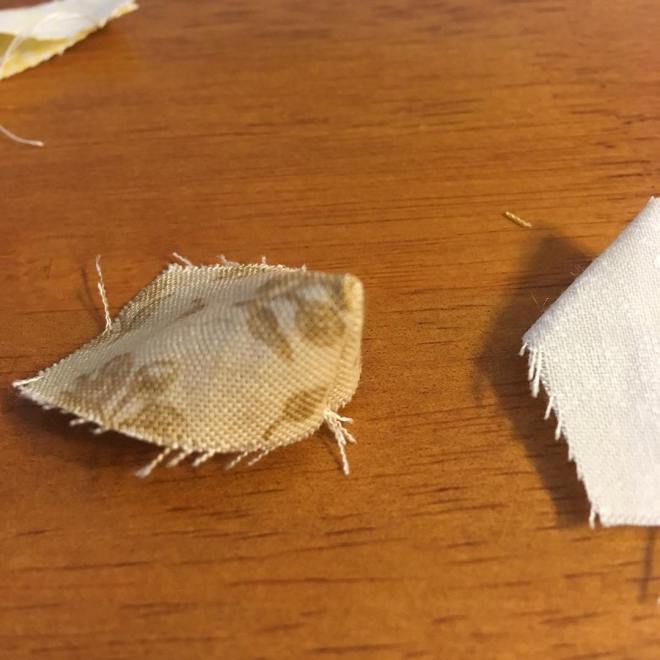
Now comes the fun part where you create the spiky tip for the petal. First, I cut a bit of material to help make the tip less bulky. This is not a step mentioned in Terri’s tutorial. By the way, don’t do like me and cut on the wrong side: you want to cut on the side where the fabric is folded, not where it is open.

Petal before and after

Figure 5. Before and after unfolding the fabric.

cut the corner

Figure 6. Cut the fabric; careful not to cut through the sewn section.

Press By Hand

Figure 7. I finger pressed the seams at this point; you may or not want to do that, I found it made the process a bit smoother.

Poked tip vs unpoked tip

Figure 8. Inverted fabric, before and after poking out the tip; careful here, I had a few incidents where I started unraveling the sewing accidentally.

3d petal

Figure 9. At this point, you have a 3-d petal. Hand press everything down to obtain a neat point.

At this point, I had 20 individual pointy petals. I decided to chain sew two petals face-to-face together. It’s faster than doing it individually. Also, I didn’t really care about the order of my petals, except to make sure I didn’t sew two of the same fabric next to each other. Then I ironed the seams open on each dual petal.

chain sewn double petals

Figure 10. Ten double petals

Sometimes, when you’re thinking about what you’re going to write in your blog, you don’t pay attention as to whether the petals are face-to-face or face-to-back.

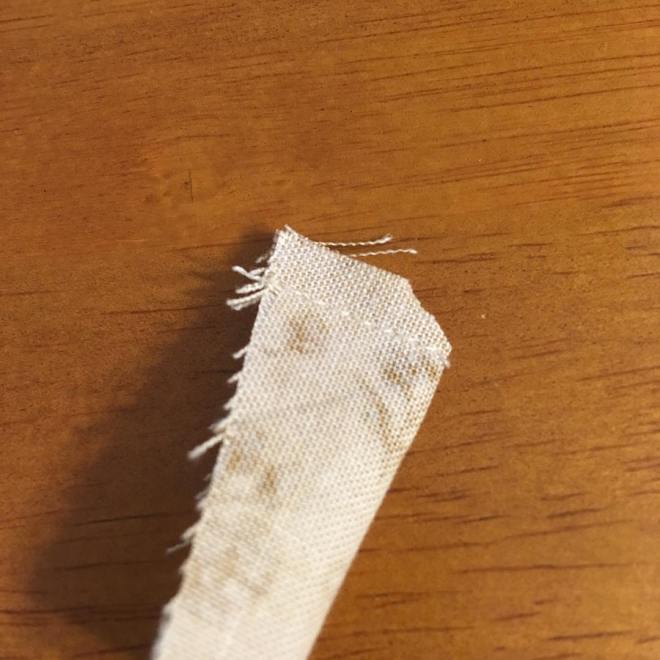
Oops

Figure 11. Oops! Here you can also see how the sewing for the tip is coming undone. It doesn’t matter since it will all be sewn down.

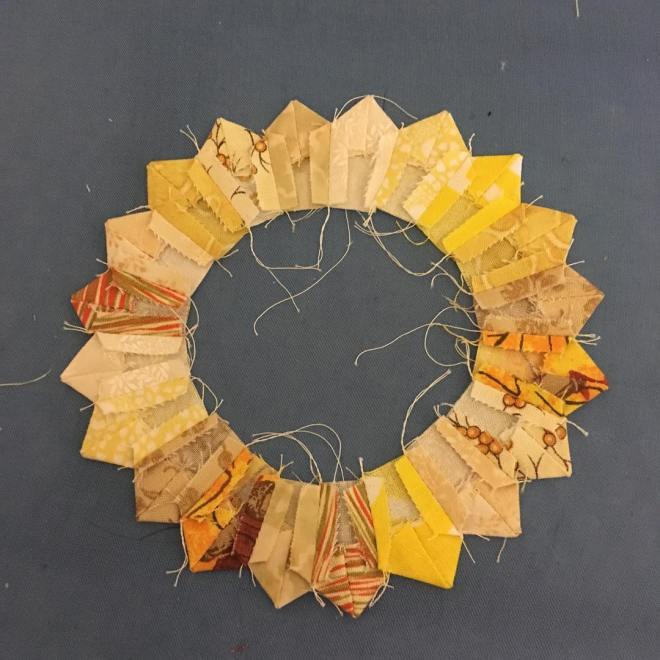
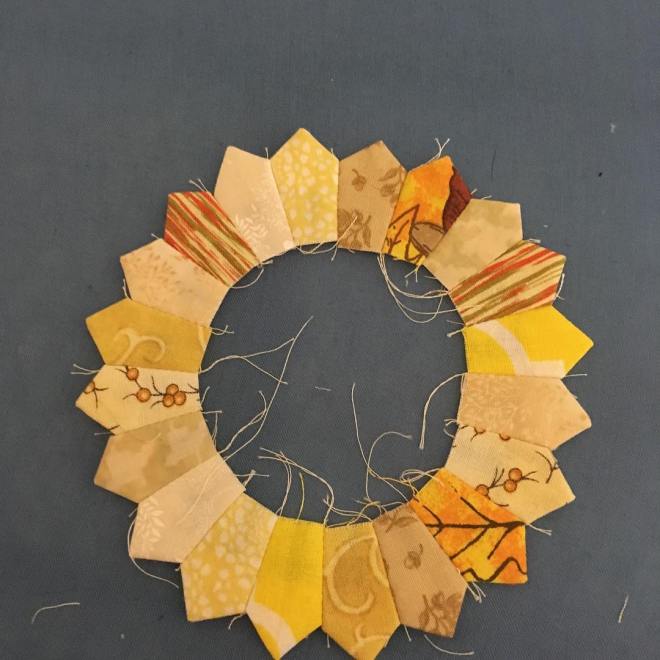
When I finished sewing all the petals together, I pressed the seams open on the backside.

Finished upside down

Figure 12. Finished petals ring, backside.

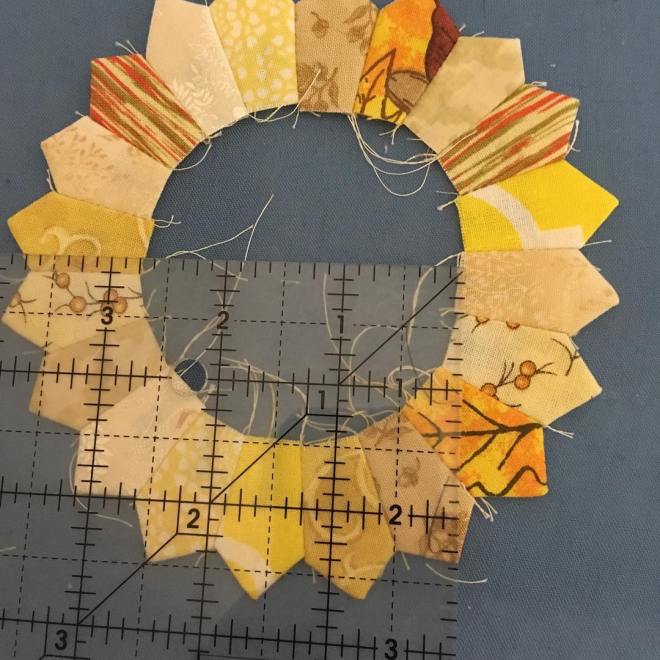
Finished front

Figure 13. Finished petals circle, front.

Now I’m ready to cut the fabric for the central hole. Except, wait a minute!

Central measurement

Figure 14. Width of the central circle. 

That central circle is supposed to be 4 inches wide, at least that’s what Terri measured for her original project. I’m not sure what has happened here. Maybe it’s because I didn’t use the same template as her to cut the petals; perhaps her template creates wider petals, resulting in a larger circle. I also just realized that I cute 20 petals but that hers has 21 petals. That too would create a larger circle, though not 4 inches.

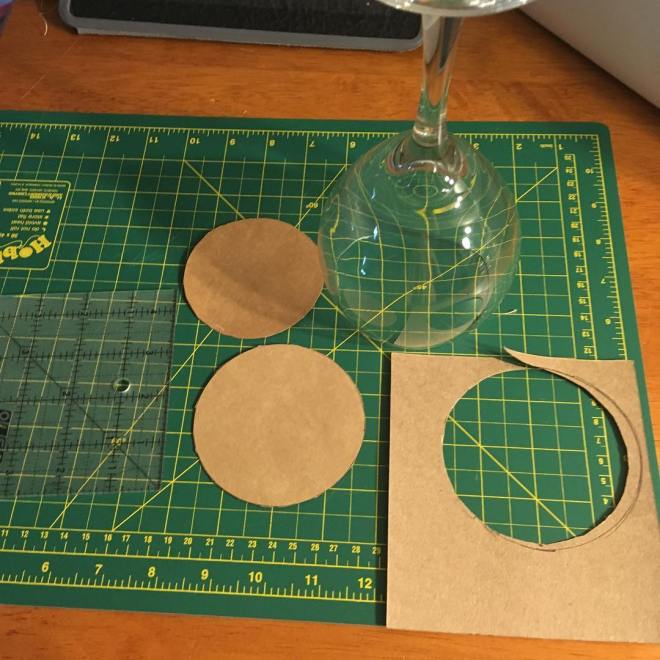
I tried cutting a template from some cardboard, but my first attempt was too small. I found a wine glass that seemed to be a good size and made a second template from that.

Templates for the center

I cut two pieces of the brown fabric, sewed them together face-to-face, cut a hole on one side and inverted the circle so that the face fabric was on top. Alas! My template was too small! I am going to have to make an even bigger one. So frustrating!

Almost but not quite

Figure 15. Too small center

ONE WEEK LATER

I set aside this project for a bit: I started a new job and was spending my time in training and not in the mood for sewing in the evening. Plus, I had to find something new to draw the circle with.

During that time, I realized why my circle was too small: the 1/4 inch seam means that you’re losing a half inch width in total when you’re doing a circle. Doh! No wonder the original pattern asked for a 4 inch circle!

After some search, I found an object with an approximate 4 inch width.

New circle

Figure 16. New template, new central fabric circles

This time, it worked! I was able to sew the brown fabric to the petals, sewing around the circle twice. Then I placed the whole project on a piece of black felt and sewed first the petals to the felt and then around the ditch of the center piece.

The finished back looks like a black sun.

Back of finished coasterFigure 17. Backside of the finished mug rug

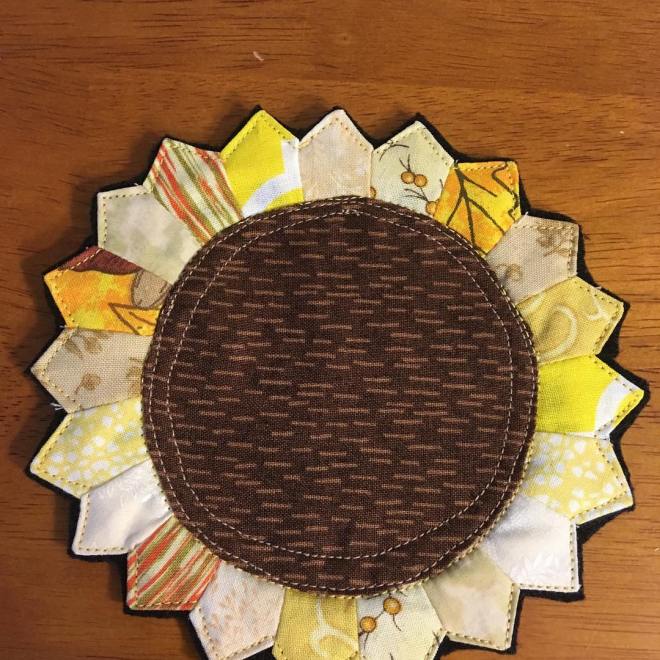
The front, however, does look like a sunflower, so I am quite happy with it.

Front of finished coaster

Figure 18. It’s really more of a coaster than a mug rug, to be honest

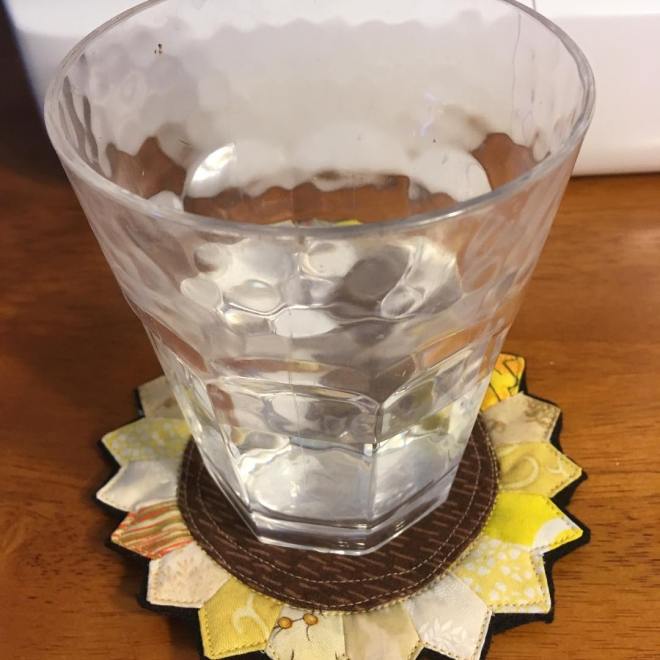
Action shot

Figure 19. Action shot!


Tip: Fabric calculators for quilts

Up to now, I have been following instructions from other people on how much fabric I need to cut for my quilts. But I am now getting to a point where I feel comfortable enough that I want to start designing my own quilts. Mostly, I just want to make small hanging quilts, but I have a project at the moment for making a queen sized quilt (but more on that in a later post).

For this latter project, I already have a bunch of fabric and I just need to figure out the size and number of pieces I can make with them, so that I can get an idea of what to do.

I found a website with a bunch of useful calculators: figuring out how much batting you need, how many squares of various sizes you can get from different width and length of fabric, and so on. Check it out: Quilter’s Paradise’s free online quilting calculators

Tip: cutting fabric

I was looking at quilting videos the other day, as one does when one is looking for inspiration, and I saw the best idea ever. I wish I had kept the link, but I looked at a bunch of videos and I don’t know which one it was.

You know how cutting a long strip of fabric can be annoying when your ruler starts to drift, no matter how hard you press down on it. Argh. It’s happened to me so many times!

Well, this woman took a simple dumbbell weight and put it at the end of her ruler! Talk about a great way to stabilize the ruler! I need to try this next time I cut fabric.

Turning Twenty Quilt Progress

Quilt Top Finished

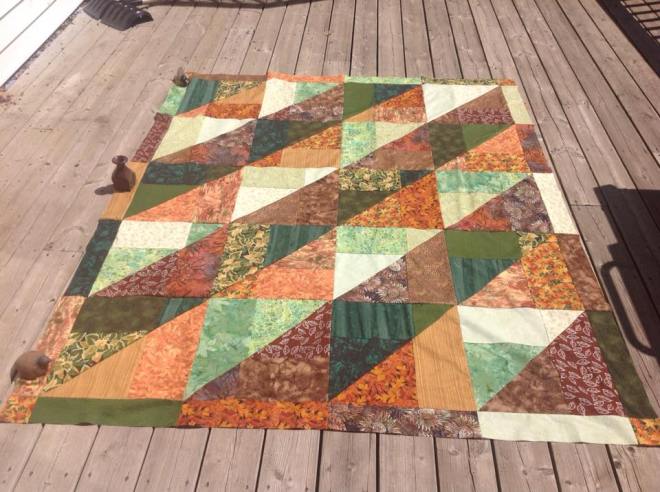
The quilt top is finished! In spite of my errors with the positions of some of the blocks, it turned out as it was supposed to, so I can’t complain too much.

I was telling some crafting friends how I don’t know anymore if I like this project because I’ve been (not) working on it for so long: I started this almost a decade ago! And really there is no reason, because as a quilt project, it is fairly straightforward. Moving a couple of times put all of my sewing on hold for a while.

So now I need to buy backing, binding and stuffing, which is going to wait a bit. Binding and backing will be yellow, I think, but I need to bring my top to a quilt store to select some fabric.

If I were to redo this project, I would use a different approach for the colours. I would use only one dark colour and only one pale colour, and I wouldn’t make them the same colour. For example, I might choose various fabrics that are dark blue and various fabrics that are yellow.

Phone charger

I was charging my old iPhone 4, which I have transformed into a pseudo-iPod, and had placed the phone itself on the floor. Not the most ideal setup, as I was constantly worried about accidentally stepping on it.

I had seen a couple of phone charging station sewing projects, so I thought I’d give it a go. However, I was unsatisfied with the look of the two projects I retained.

I liked the pocket of the project that nilmerg had helpfully translated and put on Craftster (adding the original link, in case the Craftster one ever disappears – it’s in German, so you are forewarned). But I didn’t like the square hole or the fact that said hole wasn’t very reinforced.

On the other hand, Amy Bell over at Positively Splendid has a pattern which includes a grommet for the hole, but I didn’t like the look of the pocket.

So I decided to combine the two: use Amy’s pattern, but make the pocket with pleats, like nilmerg’s pattern. The best of both worlds. What could possibly go wrong?

Well, of course, everything! Although, surprisingly, not so much actually went wrong.

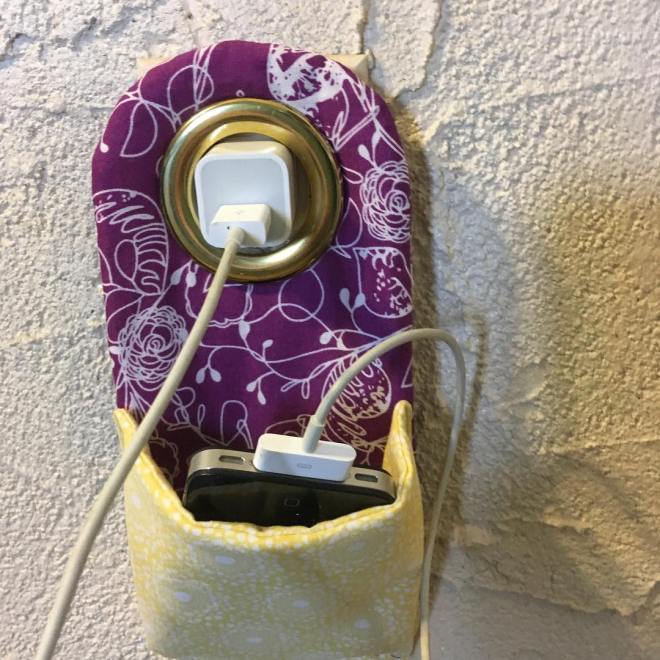
Here’s the finished product pictures. I didn’t take pictures during the process because it’s my birthday today and I didn’t want to spend too much time on this project.

Charger Station

I chose some rests of fabrics I had from previous projects. Now that I’ve finished, I realize that I should have chosen the pale fabric for the background and the darker fabric for the pocket. Oh well. You can see, also, at the bottom where I had to hand sew the bottom of the pocket to the main fabric. The pleat combined with the rather thick interface I put into the pocket (to make it safer for the phone) made the whole thing way too thick to sew by machine. Even the walking foot could not accommodate the thickness. In spite of that, I am happy with the choice of making the pocket with pleats on the side.

Charger Station in action.jpg

Action shot! As you can see, it works. As you can also see, this means that I can’t use the other plug in the wall.

Having removed the phone from the plug and tried to stuff the cord and the converter into the pocket, I found that they don’t fit very well in the pocket. The stupid converter is very bulky and takes up a lot of space, and the cord is hanging out of the pocket.

So now I’m wondering about possible modifications to this project. In particular, could I add special side pockets for the converter and for the cord? There isn’t a lot of space on the finished project, so finding a spot to add more pockets is not obvious.


An owl bag – a journey in learning

I consider myself an advanced beginner. I know the basics of using my sewing machine, I’ve learned a few tips and tricks that I sometimes remember to put into practice and sometimes forget, I’ve made a few simple projects. They’re not perfect, but I like them.

I know my limits, though. I am not ready to tackle complicated sewing projects and I still require step-by-step instructions in how to do a project. Sometimes, I come across projects that have the bare minimum of explanations on how to get it done (no information on what size to cut the material, few images demonstrating what to do); I barely understand what is required of me, so I put those aside.

When I first saw SewMamaSew’s owl tote, though, I knew I had to make it. It didn’t hurt that it was a free project.

SewMamaSew Owl Tote

Figure 1. From SewMamaSew – is this not the cutest bag ever? How could a birdwatcher resist?

I reviewed the instructions to make sure I understood them enough to actually make the bag, poked around my stash to find fabric, and, satisfied that I had everything I needed, set about making the bag.

Although the project suggests using batting, I replaced it with fusible interfacing – mostly because I didn’t have enough batting and I didn’t want to go out just for that.
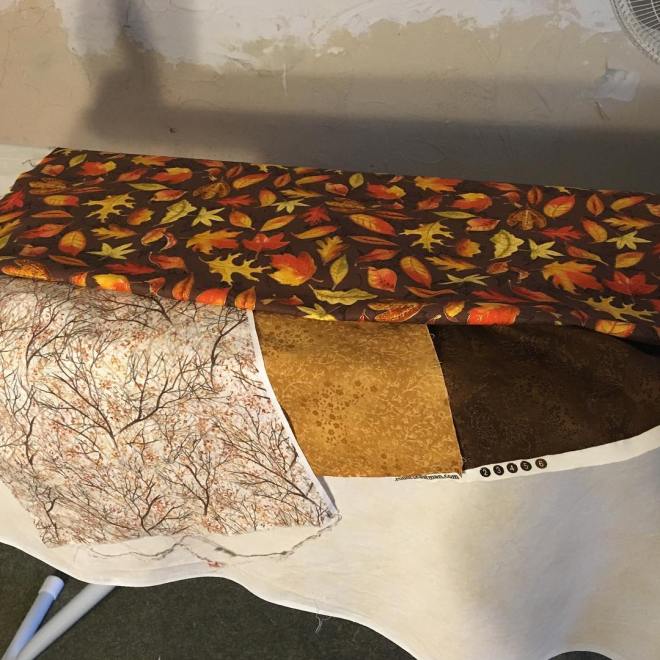
Fabric choice

Figure 2. Some rests from other projects and some fat quarters. The pale yellow will serve for the exterior of the bag, the leaf fabric for the interior, and the branches and two browns will be used for the flap and the pockets

Cut fabric

Figure 3. Fabric cut; I chose the moose ribbon for the strap rather than use fabric

Blood

Figure 4. While I was prepping the yellow fabric, I pricked my finger and got blood all over the paper; by a minor miracle, none got on the fabric itself.

I cut two pieces of the moose ribbon, sewed them together and put the strap aside for the moment.

Right off the bat, I encountered a problem understanding the instructions, because the first thing you’re supposed to do is sew the flap to the top of the bag interior. But it didn’t say if you were supposed to sew the two parts of the flap together. I puzzled over the picture, read through the instructions, and still couldn’t figure it. After some head scratching, I decided that I could definitely see sewing on the sides of the flap, so that must mean I was supposed to sew the two parts together. So that’s what I did, and oh, I did such a good job! I remembered to snip the parts where the sewing creates squares so that I could have a nice point once I inverted everything back right side out.
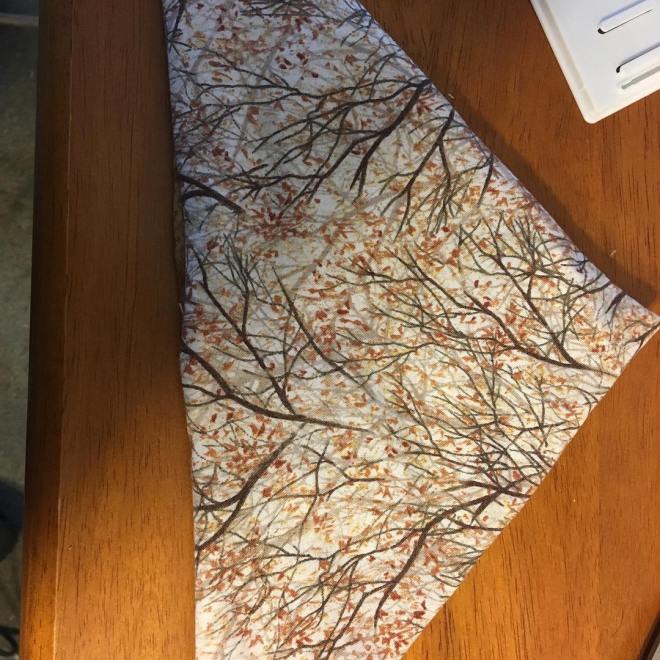
Such a lovely flap too bad I had to undo it

Figure 5. Look at the tip, how nice and pointed it was. Sigh.

I also sewed up the side and front pockets and the so-called ears while I was at it. In actual fact, I sewed the pockets first (well, right after the strap) and forgot to snip at the corners, so my corners are not as nice as they could be; but I did remember to snip whenever there was a curve, which gave me a semi-nice curve as you can see at the bottom of the side pocket below.

Front and side pockets finished

Figure 6. Ears, front pocket, and the two side pockets. The dark brown is the exterior, the branches fabric is the interior of the pocket.

That was my first day.

That night, I woke up and realized I had made an error. I should not have sewed the two parts of the flap together. In actual fact, the internal part of the flap is sewn to the interior of the bag, and the external part of the flap is sewn to the exterior of the bag. I had to unsew the flap, and oh, how sad that made me, you have no idea.

Smoothing more sides

Figure 7. Sorry about the out-of-focus picture there. These sections had originally been squares, now I had to cut the fabric to make the sides cleaner

Now I could sew the internal bag correctly. I was happy I had decided on a whim to buy clips I found at Walmart; they made the process a lot easier than using pins.
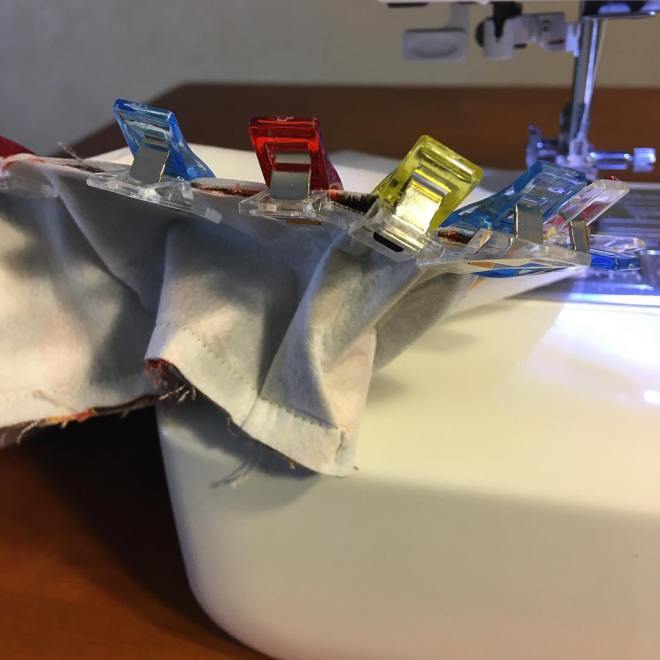
Sewing the sides to the front or back using clips

Figure 8. Sewing the sides to one of the interior panels; as you can see, the clips were most useful where the fabric made a curve at the bottom

Two parts of the inner bag

Figure 9. Parts of the interior bag

Inner Bag finished

Figure 10. Inner bag finished.

Now I could start on the outer bag, and here I encountered more problems. First I sewed the front pocket to the front of the bag, and that went well.

Front Pocket

Figure 11. Sewing the front pocket to the front panel wasn’t an issue, but getting rid of the creases proved well nigh impossible

Then I had to sew the back pocket to the zipper to the back panel and the top contrasting panel, and that proved problematic. I had never added a zipper in the middle of a panel before and I didn’t know what I was doing. Luckily for me, a friend had previously pointed me to ikatbag.com as a source of bag making information and she has a whole series on how to integrate zippers into your bags. In particular, I studied this explanation for a flat pouch, but I have to admit I didn’t completely understand the instructions and I didn’t apply her explanations correctly.

If you look at her explanations, she shows clearly how you add fabric to the sides of the zipper that go all the way to the end of the bag. I did not do this. I should have done this. Instead, I put a fabric stop at one end and none at the other end. This made it really hard to sew the zipper to the fabric around it. Next time, I will follow ikatbag’s suggestions completely. You can see below how I had to sew crooked around the ends of the zipper in order to make sure that it was sewn to the two fabrics above and below it.
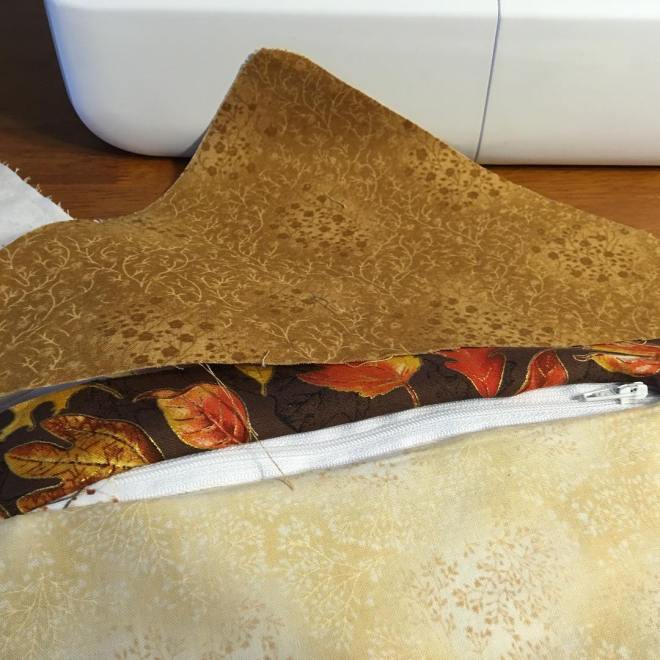
Mismatching fabric

Figure 12. I also noticed at this point that the rectangle of fabric that goes at the top of the back panel was supposed to be the same as the top of the flap. Since I had already sewn the zipper and there was no way I was undoing it, I decided that this was going to be a feature, and totally not a bug.

At this point, I sewed the sides and bottom to the front panel, and the back panel to the sides and bottom, giving me a completed external bag.

If I had read carefully, though, I would have realized that I was not supposed to do that.

I realized that something was wrong when I went to the next step: sewing the side pockets to the side and front of the bag.

Sewing a side pocket to the outer bag

Figure 13. Side pocket pinned to side and front of bag.

I couldn’t sew the pocket! Well, I could, but only with great difficulty and also sewing the front and back panels together, which obviously was not supposed to happen.

If I had read correctly, I would have seen that I wasn’t supposed to sew the bottom of the bag so soon. So I undid part of the bottom and that solved the issue.
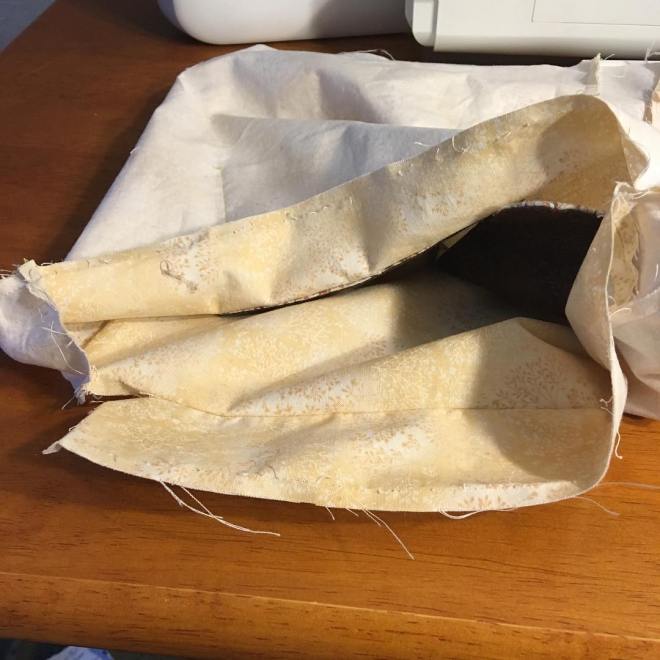
Undid the bottom of the outer bag

Figure 14. Have I ever told you how much I hate unpicking thread? Ugh. So painful!

Once I had realized my error, I was able to sew the side pockets without an issue. Then I resewed the bottom. At this point, I had my inside and outside bags.

Inner bag and outer bag

Figure 15. The internal and external bags are almost ready. I just needed to add the eye buttons and the snap to the external bag. 

Once the buttons were hand sewn to the external bag, I hand basted the strap and ears to each side of the external bag, then slipped that bag inside the internal bag, and then I put the project on hold for a while.

Getting ready to sew inner and outer bags together

Figure 16. Inner and outer bags clipped together, waiting for me to gather my courage for the last push.

I have to admit, I wasn’t too happy about having to sew the inner and outer bags inside-out and then having to pull them through a small hole. The inner bag was quite stiff because of the interfacing and anyway, this process of sewing something right sides facing and then pulling them through a tiny hole is such a painful one. We hates it, my precioussss! And I didn’t want to make an error while sewing the two parts together, so I went looking through the web and found a video where, instead of doing this, the person simply put the inner bag into the outer bag, put the flap between the two, and sewed the tops together (making sure to flip down the topmost part so the raw edges wouldn’t be exposed.

I am pretty sure I could do that with this bag. But, since I had been following the instructions, I was too far along to do that.

Today, I finally had time to finish the bag. But wait! Did I have time to make one last error? Of course I did!

Oops Button Error

Figure 17. Oops! I sewed the bottom part of the snap button upside down. Sigh. 

After correcting the button and topstitching around the top of the bag, I was finally finished. And here is my version.

Finished Bag

Figure 18. Finished, finally.

Inside the back pocket

Figure 19. Bonus picture. Back pocket looking like a monster about to eat us! 

So what have I learned from this project? First: be more careful when I read the instructions. I could have saved myself a lot of time and annoyance if I had done a full and careful read-through from start to finish. Also, if I had taken the time to put the various pieces together before sewing them, I would have noticed that the back rectangle was cut from the wrong fabric for my bag (if I had used the same contrasting fabric everywhere, as the original purse did, it would not have been an issue).

Second: I need more practice with sewing zippers to bags, especially zippers in the middle of the bag. I will make an effort to find projects like this in the near future.

Third: The length of the strap is too short for the size of the bag. If I remake this bag, I’ll use a longer strap. I’m not sure if this is an error on my part or what – in the original picture, the strap looks plenty long. Maybe it’s just that I like long straps.

Fourth: I need to buy starch and see if that helps get rid of the wrinkles. I hate wrinkly bags

Fifth: If I do redo this bag – and I may, I do love me some owls – instead of following the instructions as is, I will use the “no having to turn the bag inside out” approach.